---
title: Project initialization
noIndex: false
noContent: false
---
Deepnote provides an optional feature to run custom Python initialization code every time your project hardware boots up. To utilize this capability, you will need to **include an 'Init' notebook** in your project.
To create an 'Init' notebook:
- Click on the **Environment** selector in the project sidebar.
- Click on the **Create an initialization notebook** button at the **Custom initialization** section on the right.
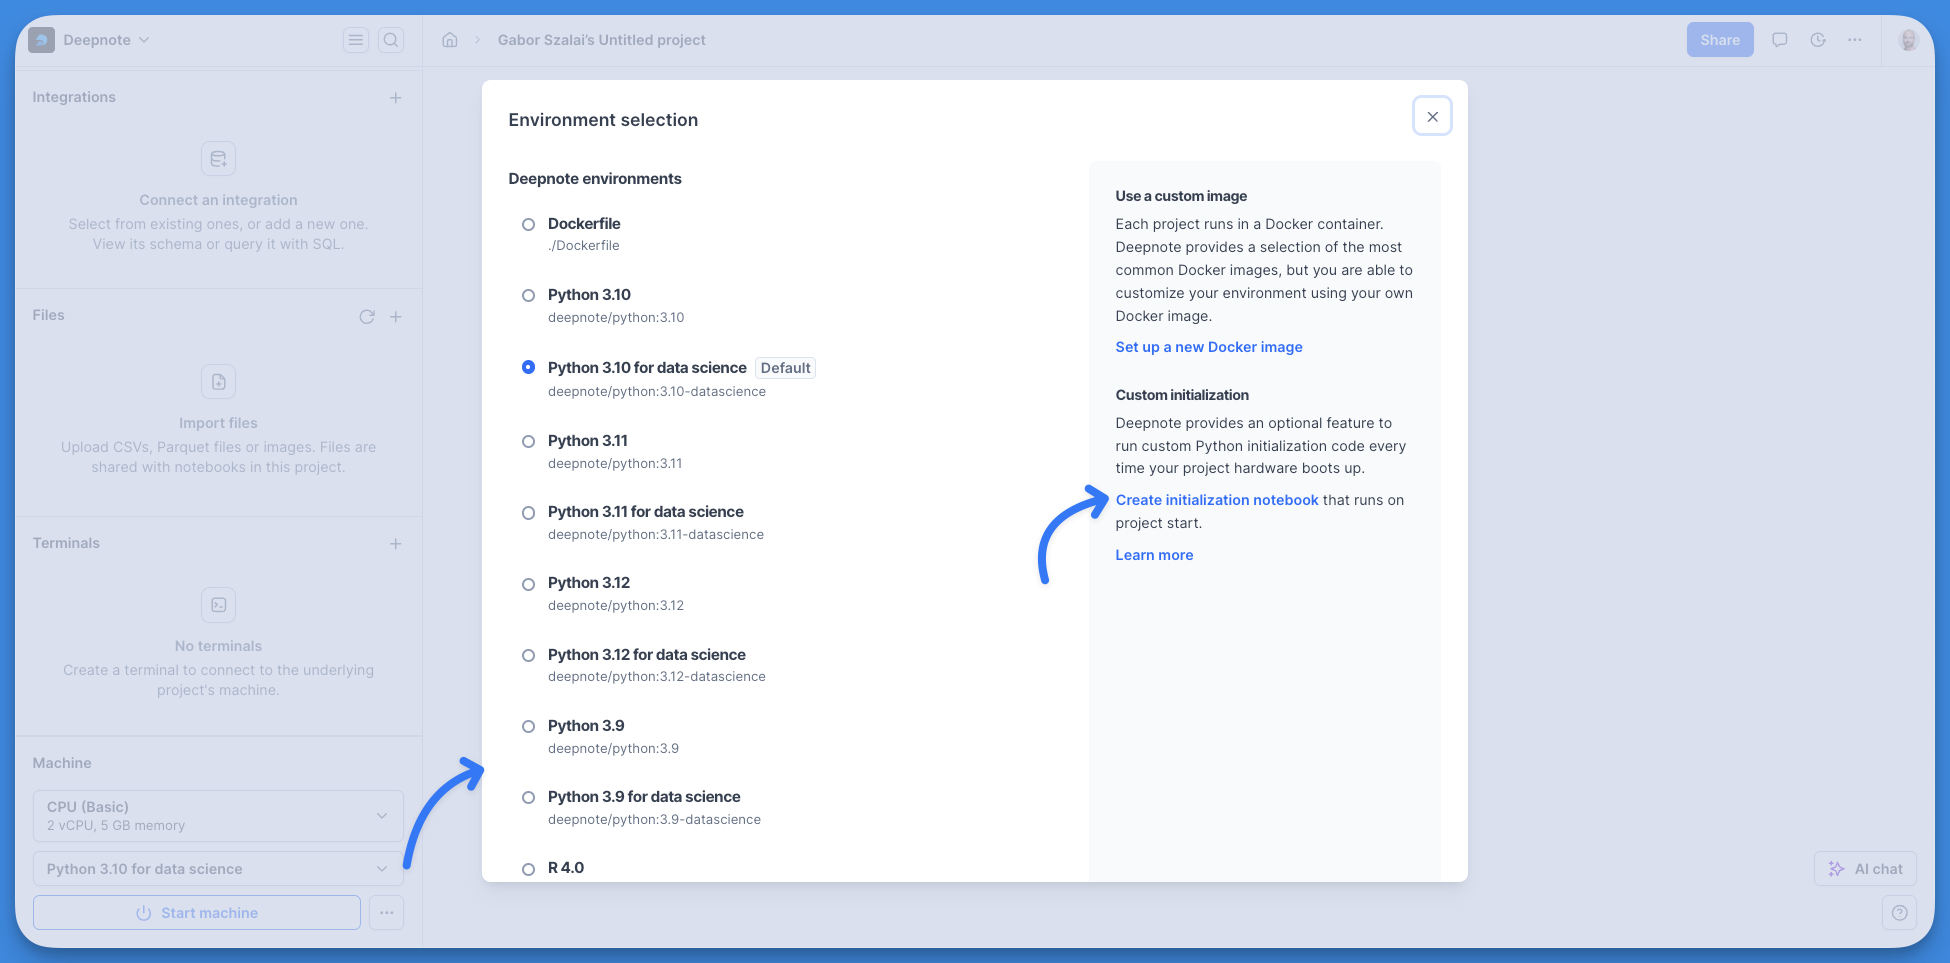
Alternatively, you can also simply create a new notebook by pressing the plus button in your Notebook list and name it as 'Init'.
After creating it, the 'Init' notebook will be conveniently located at the top of your Notebook list.
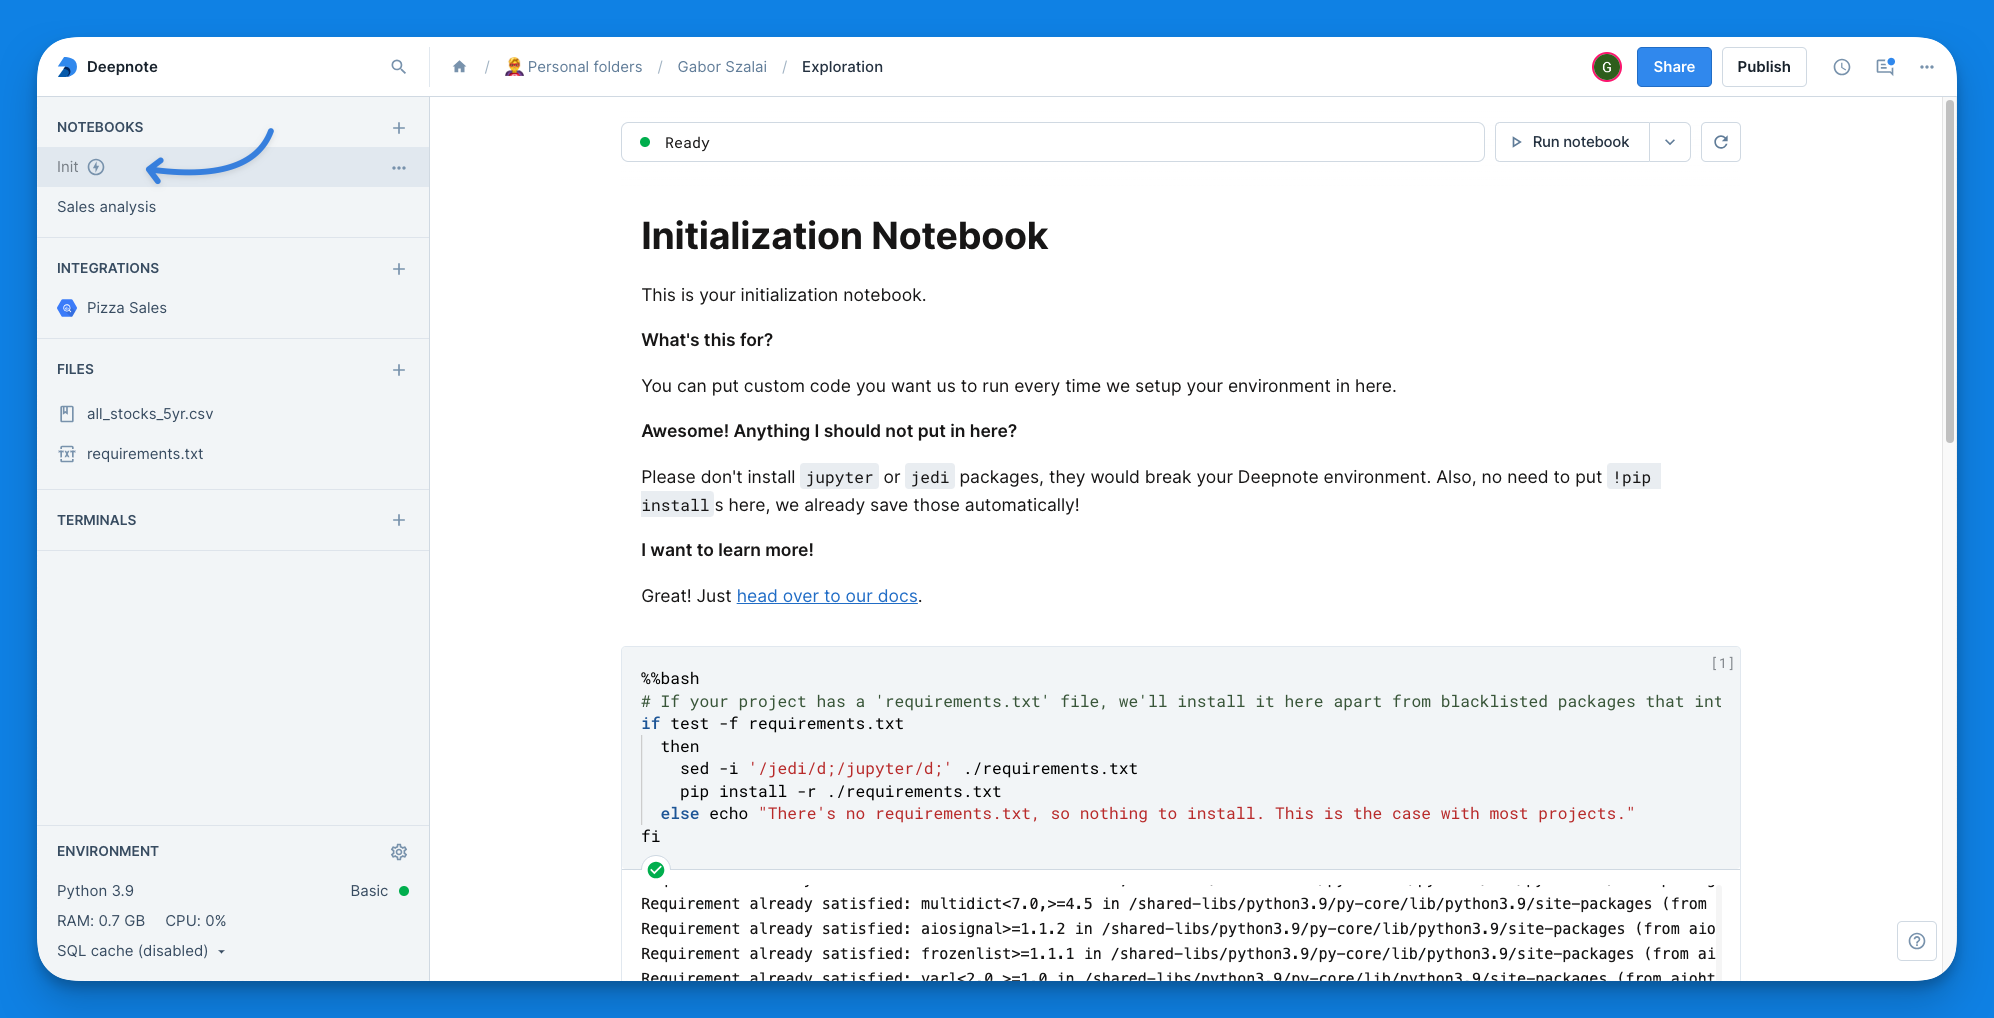
The contents of this notebook will automatically execute each time your project starts up, providing an ideal place to set up your preferred environment.
Please note: the 'Init' notebook will only act as an initialization notebook if it's called '**Init**' and it is marked by the configuration notebook symbol (lightning icon). For instance, if you create a notebook called 'init', that won't be automatically run at project startup.
By default, the 'Init' notebook installs any packages listed in ./requirements.txt. This provides a convenient option to ensure you have all package dependencies ready. However, you are free to add any other code into the 'Init' notebook according to your project's needs.
<Callout status="warning">
**There are 2 packages on the disallowlist:** `jupyter` and `jedi`. These are packages that interfere with the way Deepnote works and their installation would break your environment. In the 'Init' notebook , we scan the requirements files for those packages and skip their installation if they are there.
</Callout>
deepnote - docs amazon ecr
2877 characters
---
title: Amazon Elastic Container Registry
description: Do you have a private Docker image on Amazon ECR that you want to use in Deepnote? No problem. Follow these steps use your custom environment.
noIndex: false
noContent: false
---
<Callout status="info">
Available on the Enterprise plan
</Callout>
With Amazon ECR, you can run notebooks in your own custom environments using Docker containers.
## How to connect to Amazon ECR
To add a connection to ECR in Deepnote, go to **Integrations** in the **left-hand sidebar** and create a new Amazon ECR integration.
You will need the **Account ID** and the **Region** where your registry is located. You will also need an **Access key** and **Secret key** for an [IAM user](https://docs.aws.amazon.com/IAM/latest/UserGuide/id_users_create.html) with the following permissions:
- ecr:BatchGetImage
- ecr:GetDownloadUrlForLayer
- ecr:GetAuthorizationToken
You can set the [policies on the registry level](https://docs.aws.amazon.com/AmazonECR/latest/userguide/repository-policy-examples.html) instead to limit access to specific repositories.
### Authenticating using an IAM role
Using an IAM role instead of a username and password to connect to your ECR is preferred for enhanced security and easier management. IAM roles offer temporary credentials that automatically rotate, reducing the risk of long-term credential exposure. This approach also simplifies permissions management, allowing for more granular access control to ECR images based on the principle of least privilege. Moreover, it eliminates the need to store static credentials, reducing the potential for security breaches.
Select the IAM role option in the "Authentication" section in the dropdown menu.
Enter the Amazon Resource Name (ARN) of the AWS role you wish to use for this integration. This role should be configured with the necessary permissions to access ECR and download images. For example, you can assign the policy named `AmazonEC2ContainerRegistryReadOnly`.
To allow Deepnote to access your ECR, you must update the role's trust policy. Copy the generated trust policy and update your role's trust relationship in the AWS IAM console.
## How to use Amazon ECR in Deepnote
After creating and connecting the integration, you can create a [custom environment](/docs/custom-environment) based on one of your Docker images.
Click the Environment dropdown in the Machine section in the left-hand sidebar to bring up the Environment selection modal. Click on "Set up a new Docker image," enter the URL for the image you want to use, and give it a name. Clicking "Add environment and apply" will restart your machine using your Docker image.
<Callout status="info">
**Your credentials are encrypted and securely stored in our database.** When you delete this integration, we also wipe your ECR credentials from our systems.
</Callout>
deepnote - docs deprecating personal workspaces
2517 characters
---
title: Deprecating Personal Workspaces
noIndex: true
noContent: false
---
In order to improve user experience, we are deprecating Personal workspaces and replacing them with regular workspaces on the Free plan. This change will take place starting **November 28, 2022**.
### What is changing?
Until now, when you signed up for Deepnote, whether you were creating your own team or joining an existing team, you would also have a special Personal workspace which had your name.
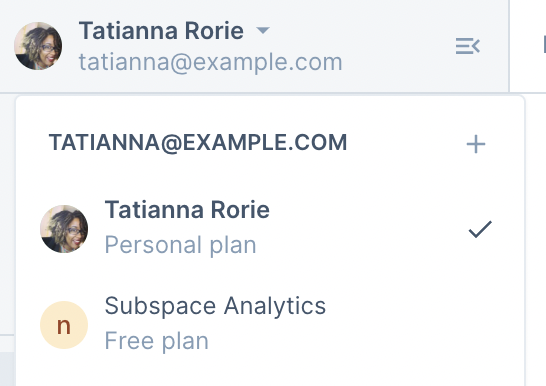
Starting November 28, 2022, we will be migrating all Personal spaces to the Free plan. **You will continue to have access to your workspace, as well as all your projects.** The only difference is that your projects will be migrated to a workspace on the Free plan.
### Why are we doing this?
We found that many users were confused about the difference between personal workspaces and other workspace types. For example, users would create a project in their Personal space by accident, when they actually meant to create it in their company’s workspace. We therefore decided to unify personal workspaces so they behave the same as every other workspace. This is aligned with our goal of making Deepnote more organized and intuitive for everyone.
### What does this mean for me?
1. Because your personal workspace will be migrated to the Free plan, it will have the same limits as the Free plan. For example, there may be some integrations that you won’t have access to, such as BigQuery or Snowflake. You can find a full list of Free plan features on our [pricing page](https://deepnote.com/pricing).
2. One benefit of switching to the free plan is that you can start inviting members to your workspace 🎉 You can do so by visiting your workspace settings.
3. You can also rename your Personal workspace, just like any other workspace you use.
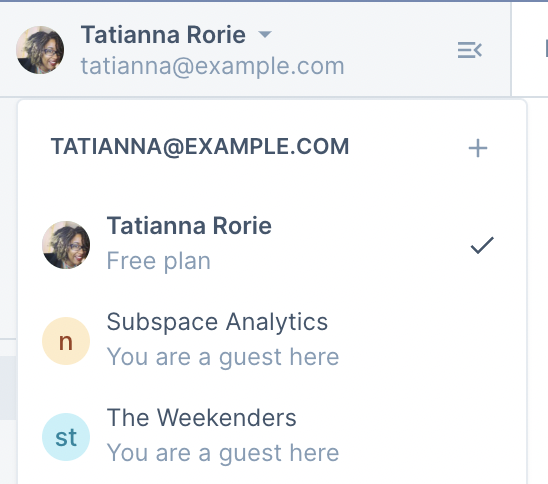
4. The _Shared with me_ tab is going away. If you want to visit projects that were shared with you, you can find them via the Workspace menu in the top left. For every project that is shared with you, you will show up as a guest in that workspace.
### What will happen to my public profile?
If you are used to sharing your work via your [public profile](https://deepnote.com/pricing), can keep doing so on the Free plan (and all plans). Any projects you publish will continue being displayed in your public profile, without any action needed from you.
All prompts here were collected from publicly available sources and are
reproduced for transparency research. Browse the
data analytics category, the
full gallery of 400+ products, or read the
paper behind the AISPA standard.